Learn how to propagate string of pearls from beads in this step-by-step guide. Create a stunning display while expanding your succulent collection.
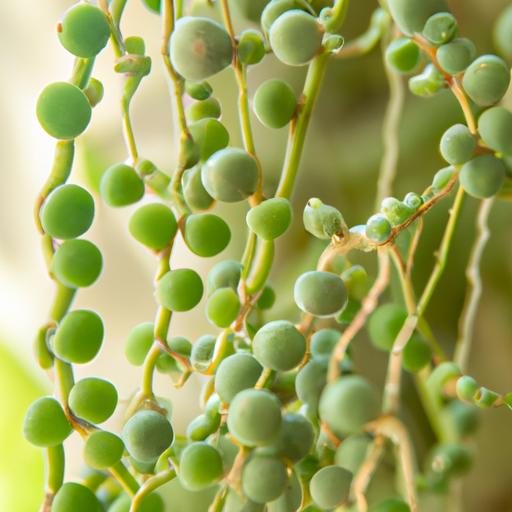
If you’re a succulent enthusiast, you’ve probably encountered the mesmerizing string of pearls plant (Senecio rowleyanus). Its cascading vines adorned with round, bead-like leaves make it a favorite choice for indoor gardens and terrariums. While there are various methods to propagate string of pearls, one method stands out for its creativity: using beads. In this article, we’ll explore the process of string of pearls propagation from beads, providing you with a simple and effective way to expand your succulent collection.
Understanding String of Pearls Propagation
Before we dive into the bead propagation method, let’s first understand the natural propagation process of the string of pearls plant. Like many succulents, this plant can propagate through its trailing stems, which develop small adventitious roots at the nodes. These roots allow the plant to establish new growth wherever the stems touch the soil. However, with the bead propagation method, we can mimic this natural process while creating a visually appealing way to propagate string of pearls.
Step-by-Step Guide: String of Pearls Propagation from Beads
Step 1: Gather necessary materials
To start your string of pearls propagation journey, you’ll need a few key materials:
- String of pearls plant with healthy vines
- Glass beads or decorative beads of your choice
- Clean, sharp scissors or pruning shears
- Well-draining potting mix suitable for succulents
- Small pots or containers
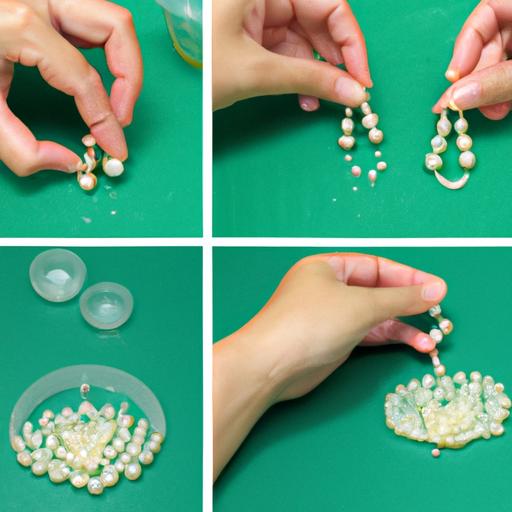
Step 2: Preparing the beads for propagation
Before we begin the propagation process, it’s important to prepare the beads. Ensure they are clean and free from dirt or debris that could potentially harm the plant. You may choose to soak the beads in water briefly to ensure they are thoroughly cleaned. This step will help maintain a healthy environment for your string of pearls cuttings.
Step 3: Preparing the string of pearls cuttings
Take your scissors or pruning shears and carefully select healthy vines from your string of pearls plant. Look for long vines with several pairs of plump, healthy leaves. Using a clean cut, remove a section of the vine that is approximately 3-5 inches long. Remove any excess leaves from the bottom 1-2 inches of the cutting, as this will be inserted into the beads.
Step 4: Stringing the beads and cuttings together
Now comes the fun part! Take your prepared beads and carefully thread them onto the string of pearls cutting. Gently insert the cut end of the vine into the first bead, allowing it to rest snugly inside. Continue threading the beads onto the vine until you reach the desired length or use all the cuttings. This method provides support for the cuttings and creates an eye-catching display.
Step 5: Caring for the propagated string of pearls
Once your string of pearls cuttings are securely threaded through the beads, it’s time to provide them with the care they need to establish roots. Fill small pots or containers with well-draining succulent potting mix and gently place the beaded cuttings into the soil, ensuring they are stable. Put the pots in a bright location with indirect sunlight, as direct sunlight can scorch the delicate leaves. Water the cuttings sparingly, allowing the soil to dry out between waterings. Overwatering can lead to rot, so finding the right balance is essential.
Frequently Asked Questions (FAQ)
Can any type of beads be used for propagation?
Yes, you can use a variety of beads for string of pearls propagation. Glass beads, plastic beads, or decorative beads can all work well. The key is to choose clean beads that won’t harm the plant. Avoid beads with sharp edges or coatings that may leach chemicals into the soil.
How long does it take for the cuttings to root?
String of pearls cuttings typically take around 4-8 weeks to root, depending on factors such as temperature and humidity. During this time, it’s crucial to provide the cuttings with a stable environment and proper care to encourage root development.
Can I propagate string of pearls in water instead of using beads?
While water propagation is popular for many succulents, it is not recommended for string of pearls. The delicate leaves and the risk of rot make water propagation less suitable. Using beads provides better support and allows for an easier transition into the soil.
What are the signs of successfully propagated string of pearls?
A successfully propagated string of pearls will exhibit signs of new growth and root development. Look for small, white root formations emerging from the base of the cuttings. Additionally, the leaves should remain plump and healthy, indicating that the plant is adapting well to its new environment.
How often should I water the propagated string of pearls?
String of pearls is a drought-tolerant succulent, so it’s important not to overwater the propagated cuttings. Water sparingly, allowing the soil to dry out between waterings. Aim to water approximately once every two weeks, adjusting the frequency based on your environment’s humidity and temperature.
Conclusion
Propagating your own string of pearls from beads is not only a rewarding experience but also a fantastic way to expand your succulent collection. By following the simple steps outlined in this guide, you can create a visually appealing display while successfully propagating healthy string of pearls plants. Remember to provide them with the care they need, ensuring they receive adequate sunlight, well-draining soil, and moderate watering.
So, why not give it a try? Embark on your own string of pearls propagation journey today and watch as your collection grows with beauty and charm. For more expert tips and inspiration in organic gardening, visit Rowe Organic – your green sanctuary for all things natural and sustainable. Cultivate, nurture, and grow naturally.